Installing and configuring TISBackup on Debian
Setting up the GNU/Linux Debian server
In order to install a fresh Debian Linux 10 Buster (physical or virtual) without graphical interface, please refer to the Debian GNU/Linux Installation Guide.
Configuring network parameters
The different parameters presented below are not specific to TISBackup; you may adapt them as required for your environment.
Modify the following files in order to get a proper named FQDN and network addressing strategy.
In the following example:
the FQDN name is srvbackup.mydomain.lan;
the short-name of the TISBackup Server is srvbackup;
the DNS suffix is mydomain.lan;
the IP address is 10.0.0.10/24;
Configuring the name of the Debian server
Hint
The short name of the future TISBackup server must not be longer than 15 characters (the limit is due to sAMAccountName restriction in Active Directory).
The name of the TISBackup server must be a FQDN, that is to say it has both the server name and the DNS suffix.
modify the
/etc/hostnamefile and write the FQDN of the server;
# /etc/hostname of the TISBackup server
srvbackup.mydomain.lan
configure the
/etc/hostsfile, be sure to put both the FQDN and the short name of the server;
# /etc/hosts of the server
127.0.0.1   localhost localhost.localdomain localhost4 localhost4.localdomain4
::1         localhost localhost.localdomain localhost6 localhost6.localdomain6
10.0.0.10   srvbackup.mydomain.lan     srvbackup
Hint
on the line defining the DNS server IP address, be sure to have the IP of the server (not 127.0.0.1), then the FQDN, then the short name;
do not change the line with localhost;
Configuring the IP address of the Debian server
configure the IP address of the Debian Server in the
/etc/network/interfaces;
# /etc/network/interfaces of the Debian server
auto eth0
iface eth0 inet static
  address 10.0.0.10
  netmask 255.255.255.0
  gateway 10.0.0.254
apply the network configuration by rebooting the machine with a
reboot;if it has not already been done, create the DNS entry for the Server in the Organization’s Active Directory;
after reboot, configure the system language in English in order to have non-localized logs for easier searching of common errors;
apt install locales-all
localectl set-locale LANG=en_US.UTF-8
localectl status
check that the machine clock is on time (with NTP installed);
dpkg -l | grep ntp
service ntp status
date
Hint
If the NTP package is not installed.
apt install ntp
systemctl enable ntp
systemctl start ntp
update and upgrade your Debian;
apt update
apt upgrade -y
install systemd;
apt install systemd
restart the Debian server;
reboot
 The Debian server is now ready. You may now go on to the next step
and install TISBackup on your Debian.
The Debian server is now ready. You may now go on to the next step
and install TISBackup on your Debian.
Installing the TISBackup server on Debian Linux
install the required dependencies:
apt-get install unzip ssh rsync python-paramiko python-pyvmomi python-pexpect
retrieve the git sources from https://github.com/tranquilit/TISbackup and place them in the
/optfolder on your server:cd /opt/ wget --no-check-certificate https://github.com/tranquilit/TISbackup/archive/master.zip unzip master.zip mv TISbackup-master tisbackup chmod 755 /opt/tisbackup/tisbackup.py ln -sb /opt/tisbackup/tisbackup.py /usr/local/bin/tisbackup
the tisbackup command must return all tisbackup actions directly to you. For more information on the actions go to the section on using TISBackup;
[root@srvbackup.mydomain.lan tisbackup]# tisbackup
ERROR : You must provide one action to perform
Usage: tisbackup -c configfile action

TIS Files Backup system.

action is either :
backup : launch all backups or a specific one if -s option is used
cleanup : removed backups older than retention period
checknagios : check all or a specific backup against max_backup_age parameter
dumpstat : dump the content of database for the last 20 backups
retryfailed : try to relaunch the last failed backups
listdrivers : list available backup types and parameters for config inifile
exportbackup : copy lastest OK backups from local to location defined by --exportdir parameter
register_existing : scan backup directories and add missing backups to database
Configuring TISBackup
create the directory for TISBackup configuration files:
mkdir /etc/tis/
in the directory
/opt/tisbackup/samples/, you will find the filesconfig.ini.sampleandtisbackup-config.iniwhich you can use as examples. Copy one of these two files into the/etc/tisdirectory and we will describe in the next section how to customize this files;cp /opt/tisbackup/samples/tisbackup-config.ini.sample /etc/tis/tisbackup-config.ini
Launching the backup scheduled task
cp /opt/tisbackup/samples/tisbackup.cron /etc/cron.d/tisbackup
modify the
/etc/cron.d/tisbackupfile to indicate when to launch the task;
Generating the public and private certificates
as root:
ssh-keygen -t rsa -b 2048press Enter for each one of the steps;
You may now go on to the next step
and configure the backup jobs for your TISBackup.
Setting up the graphical user interface for the TISBackup server
apt-get install python2.7  python-simplejson python-flask python-setuptools sudo
python /usr/lib/python2.7/dist-packages/easy_install.py "huey<=0.4.9"
cp /opt/tisbackup/samples/tisbackup_gui.ini /etc/tis/
cp /opt/tisbackup/scripts/tisbackup_gui /etc/init.d/tisbackup_gui
cp /opt/tisbackup/scripts/tisbackup_huey /etc/init.d/tisbackup_huey
chmod +x /etc/init.d/tisbackup_gui
chmod +x /etc/init.d/tisbackup_huey
update-rc.d tisbackup_huey defaults
update-rc.d tisbackup_gui defaults
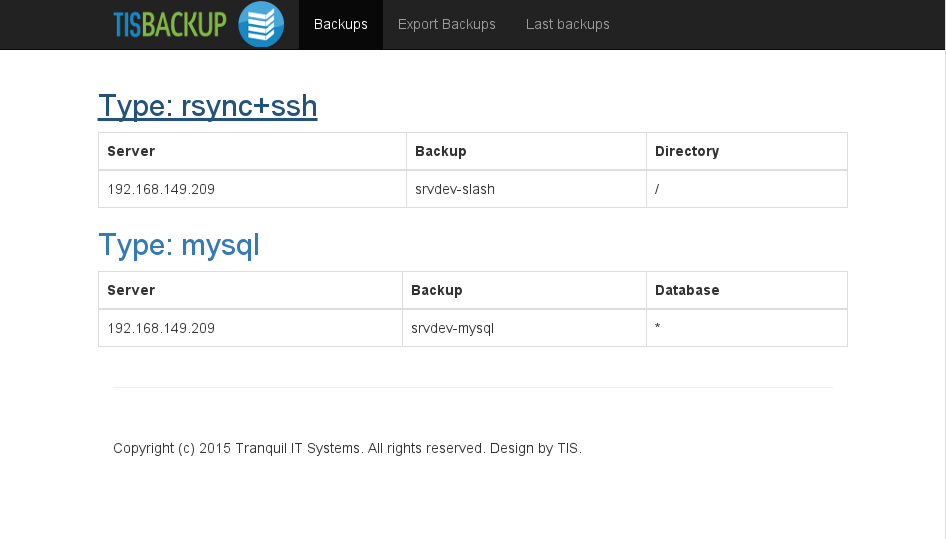
You can now access your interface through the url of your TISBackup server on port 8080.
TISBackup Web interface